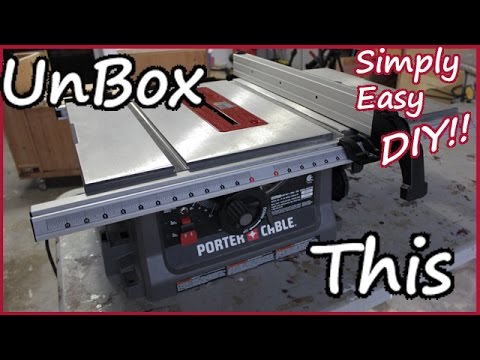
字幕列表 影片播放
Well she finally gave out on me. As I was finishing up the rabbit hutch in the last
project. I was building the stands. and she just stopped one day. So it was off to the
home improvement store to buy a new table saw. Now if I had my way, I'd drop two thousand
dollars on a saw stop but, I don't have two thousand dollars, I have four kids. That is
a lot of college. Alright so lets open up this new box and see what we're looking at.
This is the porter cable Jobsite table saw model number PCB222TS. Here on top we seem
to have the owners manual. That looks to be the blade guard. and this is the miter gauge.
Let me see what is in here, looks like I'm going to need some scissors. These look to
be the hand wheels to raise and lower the blade as well as the angle adjustment. These
are the wrenches to change the blades. And the rest of this just looks like screws, nuts
and bolts for the assembly of the stand. Here is the riving knife. It'll be nice to have
one of those. Obviously the rip fence. A few more items over here. Looks like the push
stick. Insert. And anti kick back paws. Alright let me remove this styrofoam. Looks like it's
caught on something over here. Alright and here we have the actual table saw unit itself.
I'll set that aside and take a closer look at that in just a moment. This looks to be
the roll around stand. Now I'm not too interested in this aspect of it. If you have seen any
number of my other videos you know I have a DIY Table saw workstation and I'll just
be installing this new table saw in it. So, the stand I will probably use for something
else at some later time. Let's see what else we have in here. This is the outfeed support.
Surprisingly it came with some. And the rest of this stuff just looks to be things for
the stand which as I already said, you know, I'm not going to mess with right now. Ok,
so here is the back of the unit and you can see there is a place to wrap the cord but
more improtantly there is a dust collection port. Again, if you have been around my channel
for a while you know that I've been looking for a viable solution to dust collection.
This might take care of that problem. Looks like I'm going to need an adapter for the
shop vac though. The rip fence seems to slide ok. For now anyway. Well see how that holds
up once dust starts collecting in this front rail. However, that may be the least of my
concerns. I'll have to check here in just a little bit too see if this is going to lock
down parrallel. This particular unit comes with a thirty inch rip capacity on the right
side of the blade. Eleven on the left. I like that. Alright let me install these hand wheels,
that way I can check them. That is actually a very smooth operation, I'm actually a little surprised. You can see
on the side here the spot for extra blade storage. This is the angle hand wheel.
Alright lets set this up. First the blade. Remove the arbor. and the flange. This probably
falls under the common sense catagory but when installing a blade I always reference
what direction the teeth go. They should point towards me. If I'm standing in front of the
saw like I am now. I never go by the writing on the side of the blade cause some manufacturers
will change that up.
Now this is the knob to install the riving knife. I'll loosen that up a little bit. Now
this red button here. If I press this in it will allow me to insert the knife. Then I can tighten that up. Now
the alignment on my unit was a little off and after making a few test cuts I felt was
best if I made a few small adjustments on that. So I flip the blade to fourty five degrees
and there are these two larger lock screws. Then there are some smaller set screws. So
if I loosen these larger ones up first. that will allow me to adjust the smaller ones.
Now I have to admit. There is a bit of trial and error here. Then reinstall the riving
knife. Bring it back to its zero position. and check it's alignment. The table saw insert
can be adjusted or leveled whatever you want to call it by these four set screws.
Now the ninty and fourty five degree positive stops are set and adjusted from underneath
the unit. Mine did need a minor adjustment as you see here. I'm not actually going to
show me doing that but all you do is adjust the blade so that it is square. And then adjust
the set screws that are under the saw. Alright time to check this rip fence. I am going to
use my rip fence alignment jig. I have found so many helpful uses for this thing in my
shop. If you haven't seen the video for that build yet. You can check the description.
I'll put a link to that video in there. That is not quite right but then again I doubt
this will ever be all that acuarate. Evan so i'll see about making a minor adjustment.
Lock the fence down. Loosen the two set screws on top. Unlock the fence, and press the front
of the fence against the front rail. Now, I'll move the alignment jig to the back of
the fence. Then tighten the two set screws. Now I debated whether or not I was even going
to show this procedure because at the end of it I found it didn't even make a difference.
It still doesn't lock down parallel. To be honest I'm not entirely surprised about that.
So it looks like I'll still be getting some use out of this rip fence alignment jig. The
unit also came with some outfeed support. About fifteen inches worth. Nice. I'll probably
opt to just put my outfeed support back on the workstation. I'll have to make a few adjustments
to it but, I think it'll work. So what I need to do is build a new top for the workstation.
I've decided to go flush with the top of the table saw which ironically, is how I had the
unit in the first place. If you watch the very first video that I uploaded to Youtube
which is the DIY table saw workstation Part one. You'll actually get to see how I originally
built the workstation before I did all of the upgrades. I do need to make a few modifications
to the workstation in order to get the new table saw in it. But, I think it'll work.
Visit me at simply easy diy dot com. Find me on Facebook and Pinterest. Until then.