
abstract
US /ˈæbˌstrækt/
UK /'æbstrækt/
- n. (c./u.)節錄摘要;抽象;(文章的)摘要;抽象藝術
- adj.抽象的;抽象藝術的
- v.t.正在抽象化;寫摘要;正在抽象化
B1 中級中級英檢更多access
US /ˈæksɛs/
UK /'ækses/
- n. (c./u.)通道;接近或使用的機會;訪問
- v.t.訪問
- v.t./i.存取(資料);訪問
A2 初級多益中級英檢更多actual
US /ˈæktʃuəl/
UK /ˈæktʃuəl/
- adj.實際 ; 現實;目前的
A2 初級多益中級英檢更多another method
US
UK
- phr.另一種方法
A2 初級更多application
US /ˌæplɪˈkeʃən/
UK /ˌæplɪˈkeɪʃn/
- n. (c./u.)應用程序;應用;應用;運用;申請;努力;應用
A2 初級多益中級英檢更多at least
US /æt list/
UK /æt li:st/
- adv.至少;起碼;起碼
- phr.至少;起碼
C2 高級更多basically
US /ˈbesɪkəli,-kli/
UK /ˈbeɪsɪkli/
- adv.根本上 ; 基本上;實質上;簡單地說
A2 初級高級英檢更多by default
US /baɪ dɪˈfɔlt/
UK /bai diˈfɔ:lt/
- adv.預設情況下;由於缺乏其他選擇
comment
US /ˈkɑmɛnt/
UK /'kɒment/
- n. (c./u.)評論;(電腦程式中的)註解
- v.t./i.做出評論;為(電腦程式)加上註解;批評;指責
A2 初級初級英檢更多communicate
US /kəˈmjunɪˌket/
UK /kə'mju:nɪkeɪt/
- v.t./i.交流;溝通;傳達
A2 初級中級英檢更多concrete
US /kɑnˈkrit, kɑŋ-, ˈkɑnˌkrit, ˈkɑŋ-/
UK /'kɒŋkri:t/
- n. (u.)混凝土
- v.t.具體;用混凝土覆蓋
- adj.具體的
- n. (c.)實物
- v.i.凝固
B1 中級中級英檢更多constructor
US /kən'strʌktə/
UK /kənˈstrʌktə(r)/
- n. (c.)構造函數 ; 建立者
B2 中高級更多datum
US /ˈdetəm, ˈdætəm, ˈdɑtəm/
UK /ˈdeɪtəm/
- n.資料; 數據
B1 中級初級英檢更多decode
US /ˌdi:ˈkoʊd/
UK /ˌdi:ˈkəʊd/
- v.t.譯碼
B2 中高級更多delete
US /diˈlit/
UK /dɪ'li:t/
- v.t.刪除
- n.刪除鍵
B1 中級多益中級英檢更多demonstrate
US /ˈdɛmənˌstret/
UK /'demənstreɪt/
- v.t./i.顯示;表露;遊行;演示;證實; 展示
A2 初級多益中級英檢更多dependency
US /dɪˈpendənsi/
UK /dɪˈpendənsi/
- n. (u.)依賴
B1 中級更多encapsulate
US /ɛnˈkæpsəˌlet/
UK /ɪnˈkæpsjuleɪt/
- v.t.壓縮;概括
C1 高級多益更多engineering
US /ˌendʒɪˈnɪrɪŋ/
UK /ˌendʒɪˈnɪərɪŋ/
- n. (u.)工程;工程學
B1 中級中級英檢更多for example
US
UK
- phr.例如
for now
US /fɔr naʊ/
UK /fɔ: nau/
- phr.目前;短期內
A1 初級更多for one thing
US /fɔr wʌn θɪŋ/
UK /fɔ: wʌn θiŋ/
- phr.首先
A1 初級更多for some reason
US /fɔr sʌm ˈrizən/
UK /fɔ: sʌm ˈri:zən/
- phr.由於某些原因
A1 初級更多function
US /ˈfʌŋkʃən/
UK /'fʌŋkʃn/
- n.事件;函數;功能;運作;函數 (電腦)
- v.i.當作;運作
A2 初級多益初級英檢更多go back to
US /ɡo bæk tu/
UK /ɡəu bæk tu:/
- phr. v.回到起點
A1 初級更多implement
US /ˈɪmpləmənt/
UK /ˈɪmplɪment/
- v.t.實施
- n. (c./u.)工具
B1 中級多益中級英檢更多implementation
US /ˌɪmplɪmənˈteʃən/
UK /ˌɪmplɪmen'teɪʃn/
- n. (u.)完成;執行
B1 中級多益更多inject
US /ɪnˈdʒɛkt/
UK /ɪn'dʒekt/
- v.t.增添 ;投入;注射(藥液等)
B1 中級中級英檢更多injection
US /ɪnˈdʒɛkʃən/
UK /ɪnˈdʒekʃn/
- n. (c./u.)增添(的動作);注射藥液(的動作)
B1 中級中級英檢更多insert
US /ɪnˈsɜ:rt/
UK /ɪnˈsɜ:t/
- v.t.插進 ; 嵌入 ; 插入;添加文字;(電腦)插入
- n.插;(雜誌)插頁
B1 中級多益中級英檢更多instead of
US /ɪnˈstɛd ʌv/
UK /inˈsted ɔv/
- prep.代替
- adv.寧願
A1 初級更多interface
US /ˈɪntərfeɪs/
UK /ˈɪntəfeɪs/
- n.端口 ; 接口 ; 界面 ; 介面
- v.t./i.接口
B1 中級更多layer
US /ˈleɚ/
UK /ˈleiə/
- n. (c./u.) 層 ; 一層;覆蓋層;層 (衣服);地層
- v.t.層
- n. (c.)蛋雞
B1 中級多益中級英檢更多look at
US /lʊk æt/
UK /luk æt/
- phr. v.查看;看著;看著;檢查
A1 初級更多look into
US /lʊk ˈɪntu/
UK /luk ˈɪntuː/
- phr. v.觀察;調查
A1 初級更多malware
US
UK
- n. (c./u.)惡意軟件
C2 高級更多method
US /ˈmɛθəd/
UK /'meθəd/
- n. (c./u.)方法;手段;條理;(電腦科學)方法
A2 初級多益初級英檢更多mock
US /mɑk/
UK /mɒk/
- v.t.嘲笑
- adj.模仿
B1 中級高級英檢更多of course
US /ʌv kɔː(r)s/
UK /ɔv kɔː(r)s/
- adv.當然
- phr.確信的
- interj.當然
A2 初級更多on the table
US /ɑn ði ˈtebəl/
UK /ɔn ðə ˈteibl/
- phr.在桌子上;在議程上
A1 初級更多pattern
US /ˈpætən/
UK /'pætn/
- n. (c./u.)範本;典範;圖案;花樣;模式;方式;規律;紙樣
- v.t.仿造;用圖案裝飾
A2 初級多益初級英檢更多payload
US /ˈpeˌlod/
UK /ˈpeɪləʊd/
- n. (c./u.)收費裝載量;有收入之載重;有效載荷;有效載荷;有效載荷
C2 高級更多repository
US /rɪˈpɑzɪˌtɔri, -ˌtori/
UK /rɪ'pɒzətrɪ/
- n.貯藏處
B2 中高級更多responsibility
US /rɪˌspɑnsəˈbɪlɪti/
UK /rɪˌspɒnsə'bɪlətɪ/
- n. (c./u.)職責;責任;責任 ; 職責;責任;負擔;責任感;道德責任
A2 初級中級英檢更多runtime
US /rʌn'taɪm/
UK /rʌn'taɪm/
- n. (u.)運行時
B2 中高級更多separate
US /'sepəreɪt/
UK /'sepəreɪt/
- adj.不同的;個別的
- v.t.分開;使分離
- v.i.(夫妻)分居
A2 初級多益初級英檢更多slice
US /slaɪs/
UK /slaɪs/
- n. (c.)切球;切片
- v.t./i.切(球);切片;切開;劃破;劃過
A2 初級多益中級英檢更多step into
US /stɛp ˈɪntu/
UK /step ˈɪntuː/
- phr. v.走進;介入
A1 初級更多structure
US /ˈstrʌk.tʃɚ/
UK /ˈstrʌk.tʃə/
- n. (c./u.)結構;建築物
- v.t.構成;組織
A2 初級多益中級英檢更多think about
US /θɪŋk əˈbaʊt/
UK /θiŋk əˈbaut/
- phr. v.考慮;想起
A1 初級更多tie up
US /taɪ ʌp/
UK /tai ʌp/
- phr. v.佔用
A2 初級更多trap
US /træp/
UK /træp/
- n. (c.)圈套:陷阱;雙輪輕便馬車;(高爾夫球)障礙物;嘴;牢籠
- v.t.設陷阱捕捉;捕捉 ;困住(某人);使無法逃脫;使落入圈套(或困境);困住(在某情況)
A2 初級初級英檢更多update
US /ʌpˈdet/
UK /ˌʌpˈdeɪt/
- n. (c./u.)(更新的)資訊;(新的)情況;新資訊;新情況
- v.t.更新;提供最新資訊
B1 中級多益高級英檢更多
Vocabulary
- for example: 例如
- for now: 目前
- look at: 查看
- go back to: 回到起點
- at least: 至少
- step into: 走進
- instead of: 代替
- look into: 觀察
- think about: 考慮
- of course: 當然
- another method: 另一種方法
- by default: 預設情況下
- for some reason: 由於某些原因
- tie up: 佔用
- on the table: 在桌子上
- for one thing: 首先
- access: 通道
- demonstrate: 顯示;表露
- pattern: 範本;典範
- basically: 根本上 ; 基本上
- matter: 是重要的
- structure: 結構
- separate: 不同的
- comment: 評論
- method: 方法;手段
- abstract: 節錄摘要
- implement: 實施
- concrete: 混凝土
- bit: (馬)嚼口;馬勒
- function: 事件
- state: 州
- trap: 圈套:陷阱
- pretty: 美麗的,可愛的
- create: 創造
- communicate: 交流;溝通
- actual: 實際 ; 現實
- application: 應用程序
- project: 估計
- responsibility: 職責
- layer: 層 ; 一層
- slice: 切球
- receive: 接收;收到
- mock: 嘲笑
- place: 地點
- single: 挑選出
- simple: 簡單的;單純的
- step: 舞步
- change: 換(衣服)
- business: 商業;生意
- start: 開端
- finally: (尤用於句首)最後
- implementation: 完成;執行
- insert: 插進 ; 嵌入 ; 插入
- datum: 資料; 數據
- interface: 端口 ; 接口 ; 界面 ; 介面
- inject: 增添
- decode: 譯碼
- update: (更新的)資訊;(新的)情況
- dependency: 依賴
- injection: 增添(的動作)
- malware: 惡意軟件
- engineering: 工程;工程學
- repository: 貯藏處
- encapsulate: 壓縮;概括
- delete: 刪除
- payload: 收費裝載量;有收入之載重
- runtime: 運行時
- constructor: 構造函數 ; 建立者
在 App 中使用完整體驗
隨時隨地學習,完整解析句子與用法
01:03
She took a brave step forward, leaving behind her comfort zone to chase her dreams.
單字片語
- brave
adj. 有勇氣的
- comfort zone
phr. 舒適圈
本句說明
a brave step 是名詞片語,其中 brave 是形容詞,修飾名詞 step,表示「勇敢的一步」。
forward 是副詞,修飾 step,表示「向前」。
整個片語作為受詞,回答 took(動詞) 的「什麼」——她邁出了勇敢的一步向前。
在 App 中使用完整體驗
隨時隨地查單字,掌握發音、詞性與用法
brave
US/brev/
UK/breɪv/
adj.勇敢的
v.t.勇敢地面對
A2 初級
在 App 中使用完整體驗
隨時隨地練習口說,立即獲得發音回饋
Try this speaking exercise.
試著跟著這句話練習。
80
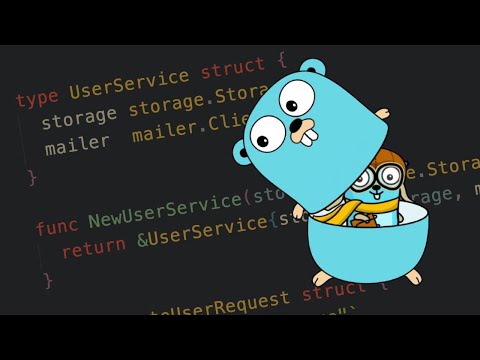
Go 專案架構指南:Repository Pattern 怎麼用? (Repository Pattern in Go - How to Structure your Projects)
0
NGUYỄN ĐĂNG QUÝ 發佈於 2025 年 02 月 07 日想讓你的 Go 專案更井然有序、方便測試嗎?這支影片將深入介紹 Repository Pattern,一步步教你如何實作儲存抽象化與依賴注入,打造更簡潔、更易於維護的程式碼。學會這些專業術語,讓你的開發技能更上一層樓!
在 APP 上學習此影片!
在 VoiceTube App 中有針對影片更深入的練習方式唷!