
adapter
US /əˈdæptɚ/
UK /ə'dæptə/
- n.編劇者 ; 改編者 ; 加減裝置;配樂師
B1 中級更多allocate
US /ˈæləˌket/
UK /ˈæləkeɪt/
- v.t.分配 ; 調配 ; 支配
B1 中級高級英檢更多boot up
US
UK
- phr. v.啟動
A2 初級更多browse
US /braʊz/
UK /braʊz/
- v.t./i.瀏覽;在電腦上瀏覽;吃草
- n. (c./u.)可供瀏覽之物
B2 中高級多益中級英檢更多by default
US /baɪ dɪˈfɔlt/
UK /bai diˈfɔ:lt/
- adv.預設情況下;由於缺乏其他選擇
come up
US /kʌm ʌp/
UK /kʌm ʌp/
- phr. v.接近;(太陽)升起;(問題)浮現;發生;漸漸上升;即將到來
A1 初級更多configuration
US /kənˌfɪɡjəˈreʃən/
UK /kənˌfɪgəˈreɪʃn/
- n.配置 ; 結構 ; 表面配置 ; 形態
B2 中高級高級英檢更多connect
US /kəˈnɛkt/
UK /kə'nekt/
- v.t.連接;連結;連接;認識;(交通工具)銜接;聯運;接通電源;理解
A2 初級中級英檢更多console
US /kənˈsol/
UK /kən'səʊl/
- v.t.安慰 ; 慰問 ; 螺狀支柱
B2 中高級多益高級英檢更多decide
US /dɪˈsaɪd/
UK /dɪ'saɪd/
- v.t./i.下決定;決斷;(法律的)決定,判決;導致,決定了(事情的結果)
A2 初級多益初級英檢更多default
US /dɪˈfɔlt/
UK /dɪ'fɔ:lt/
- n. (c./u.)預定的;拖欠行為;違約行為;預設;默認;因對方棄權而獲勝;缺席
- v.t./i.違約;不履行債務;預設值;因對方棄權而獲勝
B2 中高級多益高級英檢更多delete
US /diˈlit/
UK /dɪ'li:t/
- v.t.刪除
- n.刪除鍵
B1 中級多益中級英檢更多demonstration
US /ˌdɛmənˈstreʃən/
UK /ˌdemənˈstreɪʃn/
- n.示範;遊行;證明認證;
B1 中級多益中級英檢更多disk
US /dɪsk/
UK /dɪsk/
- n.磁盤;圓盤
B1 中級多益中級英檢更多edition
US /ɪˈdɪʃən/
UK /ɪˈdɪʃn/
- n. (c./u.)版;版本;(書報等的)一次印刷;(電視或廣播節目的)一集
B1 中級中級英檢更多enterprise
US /ˈentərpraɪz/
UK /ˈentəpraɪz/
- n. (c./u.)公司;商業機構;企業;事業;進取精神
A2 初級多益中級英檢更多folder
US /ˈfoʊldə(r)/
UK /ˈfəʊldə(r)/
- n. (c.)文件夾
B2 中高級多益更多for now
US /fɔr naʊ/
UK /fɔ: nau/
- phr.目前;短期內
A1 初級更多generation
US /ˌdʒɛnəˈreʃən/
UK /ˌdʒenəˈreɪʃn/
- n. (c./u.)代;一代;同世代的人;代;輩
A2 初級多益初級英檢更多gig
US /ɡɪɡ/
UK /gɪg/
- n.演奏會
B2 中高級更多have to
US /hæv tu/
UK /ˈhæv tə/
- aux. v.不得不
A1 初級更多hyper
US /'haɪpər/
UK /ˈhaɪpə(r)/
- adj.亢奮的
C1 高級更多location
US /loʊˈkeɪʃn/
UK /ləʊˈkeɪʃn/
- n. (c./u.)位置;場所;外景場地;營業地點
B1 中級多益中級英檢更多method
US /ˈmɛθəd/
UK /'meθəd/
- n. (c./u.)方法;手段;條理;(電腦科學)方法
A2 初級多益初級英檢更多of course
US /ʌv kɔː(r)s/
UK /ɔv kɔː(r)s/
- adv.當然
- phr.確信的
- interj.當然
A2 初級更多on and off
US /ɑn ənd ɔf/
UK /ɔn ænd ɔf/
- adv.斷斷續續地
- adj.分分合合的
- phr.斷斷續續地
A1 初級更多option
US /ˈɑpʃən/
UK /'ɒpʃn/
- n. (c./u.)選擇;期權;選項(電腦)
A2 初級多益中級英檢更多other than
US
UK
- prep.除了…以外
- conj.不同於
- adv.不同於
A1 初級更多physical
US /ˈfɪzɪkəl/
UK /ˈfɪzɪkl/
- n. (c.)身體檢查
- adj.身體的;肉體的;物質的;物理的
- n.體育
A2 初級中級英檢更多platform
US /ˈplætˌfɔrm/
UK /'plætfɔ:m/
- n. (c./u.)平台;月台
B1 中級初級英檢更多press
US /prɛs/
UK /pres/
- n.壓平器;壓榨機;新聞組織,媒體;出版社,出版物
- v.t.熨平;催促;催逼;出版;新聞出版社;印刷機;擠壓
A2 初級多益初級英檢更多professional
US /prəˈfɛʃənəl/
UK /prə'feʃənl/
- adj.專門知識或特殊訓練的;專業的;職業的;專業的(行為舉止)
- n.專家;職業選手
A2 初級多益中級英檢更多ram
US /ræm/
UK /ræm/
- n.撞錘;公羊 ; 撞槌;隨機存取記憶體
- v.t.猛撞,猛擊;塞進
B1 中級更多recommend
US /ˌrɛkəˈmɛnd/
UK /ˌrekə'mend/
- v.t.推薦;推舉;公開支持
A2 初級多益中級英檢更多reset
US /riˈsɛt/
UK /ˌri:'set/
- v.t.重置;重新設定
- v.t./i.重啟
C1 高級更多role
US /rol/
UK /rəʊl/
- n.角色 ; 任務 ; 腳;角色
A2 初級初級英檢更多screen
US /skrin/
UK /skri:n/
- v.t.屏風;擋板;檢驗
- n.紗窗;紗門;銀幕;螢幕
A2 初級多益初級英檢更多skip
US /skɪp/
UK /skɪp/
- n. (c.)大垃圾桶;廢料桶
- v.i.(輕巧地)蹦蹦跳跳;快速處理
- v.t.不做(應做的事)
B2 中高級中級英檢更多spare
US /spɛr/
UK /speə(r)/
- v.t.抽出;撥出;擠出;饒恕;寬恕,寬容
- adj.預備的;備用的
- n.備用物品;備用零件
A2 初級中級英檢更多summary
US /ˈsʌməri/
UK /ˈsʌməri/
- adj.概要
- n.摘要:總結
B1 中級中級英檢更多switch
US /swɪtʃ/
UK /swɪtʃ/
- n.變更;更改;開或關上電源;切換開關;柔軟的細枝;鞭子
- v.t.替換
A2 初級多益中級英檢更多to boot
US /tu but/
UK /tu: bu:t/
- adv.而且
A1 初級更多version
US /ˈvɚʒən, -ʃən/
UK /ˈvə:ʃən/
- n.版本;形式;(某物的)版;版本;(軟體的)版本;說法
A2 初級多益中級英檢更多virtual
US /ˈvɚtʃuəl/
UK /ˈvɜ:tʃuəl/
- adj.虛擬;虛擬的;實質上的
B1 中級多益高級英檢更多
Vocabulary
- to boot: 而且
- by default: 預設情況下
- have to: 不得不
- boot up: 啟動
- for now: 目前
- of course: 當然
- come up: 接近
- other than: 除了…以外
- on and off: 斷斷續續地
- physical: 身體檢查
- recommend: 推薦;推舉
- default: 預定的
- version: 版本;形式
- method: 方法;手段
- spare: 抽出;撥出;擠出
- bit: (馬)嚼口;馬勒
- exist: 存在;實際上有
- virtual: 虛擬
- create: 創造
- console: 安慰 ; 慰問 ; 螺狀支柱
- switch: 變更;更改
- option: 選擇
- generation: 代
- professional: 專門知識或特殊訓練的
- click: 一拍即合
- role: 角色 ; 任務 ; 腳
- press: 壓平器;壓榨機
- leave: 離開;別離
- platform: 平台
- normal: 標準的
- notice: 注意到,留心
- enterprise: 公司;商業機構
- kind: 類
- control: 遙控器
- system: 系統;體系
- operate: 操作
- demonstration: 示範
- decide: 下決定;決斷
- connect: 連接;連結
- gig: 演奏會
- drive: 推動力; 動機
- screen: 屏風;擋板
- hyper: 亢奮的
- pick: 鎬頭
- turn: (歲數等)超過;逾
- browse: 瀏覽
- hard: 很難
- edition: 版;版本
- summary: 概要
- allocate: 分配 ; 調配 ; 支配
- configuration: 配置 ; 結構 ; 表面配置 ; 形態
- skip: 大垃圾桶;廢料桶
- folder: 文件夾
- location: 位置;場所
- ram: 撞錘
- reset: 重置;重新設定
- delete: 刪除
- adapter: 編劇者 ; 改編者 ; 加減裝置
- disk: 磁盤;圓盤
在 App 中使用完整體驗
隨時隨地學習,完整解析句子與用法
01:03
She took a brave step forward, leaving behind her comfort zone to chase her dreams.
單字片語
- brave
adj. 有勇氣的
- comfort zone
phr. 舒適圈
本句說明
a brave step 是名詞片語,其中 brave 是形容詞,修飾名詞 step,表示「勇敢的一步」。
forward 是副詞,修飾 step,表示「向前」。
整個片語作為受詞,回答 took(動詞) 的「什麼」——她邁出了勇敢的一步向前。
在 App 中使用完整體驗
隨時隨地查單字,掌握發音、詞性與用法
brave
US/brev/
UK/breɪv/
adj.勇敢的
v.t.勇敢地面對
A2 初級
在 App 中使用完整體驗
隨時隨地練習口說,立即獲得發音回饋
Try this speaking exercise.
試著跟著這句話練習。
80
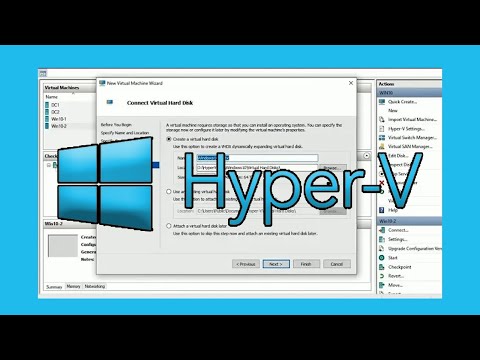
如何在 Microsoft Hyper-V 管理員中建立虛擬機! (Create a Virtual Machine in Microsoft Hyper-V Manager)
0
ballades0228 發佈於 2025 年 01 月 06 日想在你的 Windows 10 電腦上打造虛擬電腦嗎?這部影片將一步步帶你用 Microsoft Hyper-V Manager 建立虛擬機!過程中還會學到像是「虛擬硬碟」和「動態記憶體」等超實用的職場技術術語喔。
在 APP 上學習此影片!
在 VoiceTube App 中有針對影片更深入的練習方式唷!