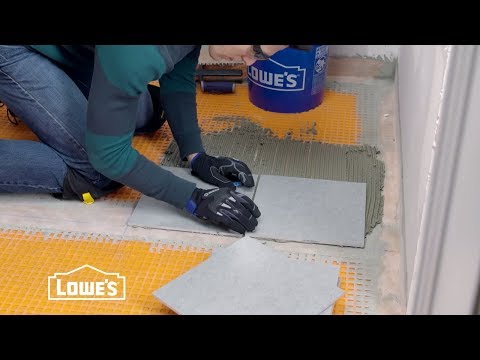
Placeholder Image

字幕列表 影片播放

  • VINCE: As you can see this bathroom renovation is in full swing, now it's time to start laying

  • some tile.

  • We've already prepped the floor with this underlayment.

  • Now if you haven't seen the prep video it's important that you watch that first.

  • We're going to be laying this ceramic tile in a jack-on-jack pattern. It's going to look

  • great for our bathroom. Now before you start, it's a good idea to

  • mix tiles from different boxes in case there's any slight difference in color.

  • All right, let's get down to business. I've

  • already mixed up some unmodified thinset mortar following the instructions.

  • It's close to the consistency of peanut butter. Starting at the mark in the center of the

  • room, fill the cavities in the matting with unmodified thinset using the flat side of

  • the trowel. It helps to run the trowel in a couple directions. Try not to cover your

  • reference lines. Now comb additional unmodified thinset with

  • the notched side of the trowel held at a 45-degree angle. Don't make swirl patterns, and just

  • put the excess back in the bucket.

  • Next, lay the tile along the reference lines. Just lightly press and twist into the thinset,

  • making sure to collapse the ridges of mortar and get full contact to the back of the tile.

  • Keep laying the tile, putting spacers in between. For tiles that are 12-in x 12-in or larger

  • it's a good idea to back butter or flat coat the backs of the tiles with thinset prior

  • to setting the tiles. Every few tiles, lift one up to make sure

  • there's full contact between the mortar and tile. If not, you can backbutter the tiles

  • again or use a trowel with larger notches to spread the thinset.

  • Watch for any mortar on the face of the tilejust wipe away with a damp sponge.

  • Once you have a few tiles set, check for high spots using a level. You can even them out

  • with a rubber mallet.

  • Keep laying the tile working in small sections.

  • Leave a ¼-inch gap between the tile and the wall to allow for expansion. And when it's

  • time to grout, be sure not to grout in this space.

  • To make cuts a tile cutter works great for small jobs, but a rented wet saw is a time

  • saver for big ones. For the tile around plumbing, use a tile drill

  • bit for holes and nippers to cut curves. And remember to leave a 1/4-inch around pipes

  • for expansion.

  • We're making big progress on this bathroom. The wall tile is up and al the floor tile

  • is down.

  • We've let the thinset dry for 24 hours, now it's time to grout. Mix it according to the

  • directions, usually a paste-like consistency.

  • Working in small sections, press the grout into the joints with a rubber float. Then

  • pull it diagonally across the joints and remove as much excess as possible.

  • After about 20 minutes wipe the grout lines in a circular motion with a sponge and clean

  • water. The remaining residue can be removed with a grout haze remover.

  • After the joints have been filled, don't walk on the floor for about 72 hours or as recommended

  • by the manufacturer.

  • Back to those expansion gaps around the plumbing. Just apply a bead of silicone sealant.

  • In three weeks the grout should be completely dry, at which time you should apply a grout

  • sealer.

  • The last step is to install any trim or transitions, and reconnect your plumbing fixtures.

  • Check it out. This new floor looks fantastic, but we're not done with this remodel yet.

  • Check out our next project at Lowes.com/HowTo.

VINCE: As you can see this bathroom renovation is in full swing, now it's time to start laying

字幕與單字

單字即點即查 點擊單字可以查詢單字解釋

B2 中高級

如何鋪設浴室地板 (How To Tile a Bathroom Floor)

  • 26 1
    nckuba 發佈於 2021 年 01 月 14 日
影片單字